Mastering Mugs
If you haven’t already, please visit our Creating Design Files article to familiarize yourself with our product templates.

Mugs. Are. Awesome. But, there are some very important things to keep in mind when designing them. In this article, we’ll go over mug templates, design file tips + requirements, and artwork placement.
Mug Template
The design area on mugs is a single rectangle that wraps around the entire mug covering left, middle and right sides of the mug’s surface. The red crosshairs indicate the center of the mug on the left and right sides.
Design File Tips + Requirements
File Type + Size
All of our mugs require a JPEG image at 300ppi. The JPEG Quality should be set to 100%. The final size of the design file will vary depending on the mug.
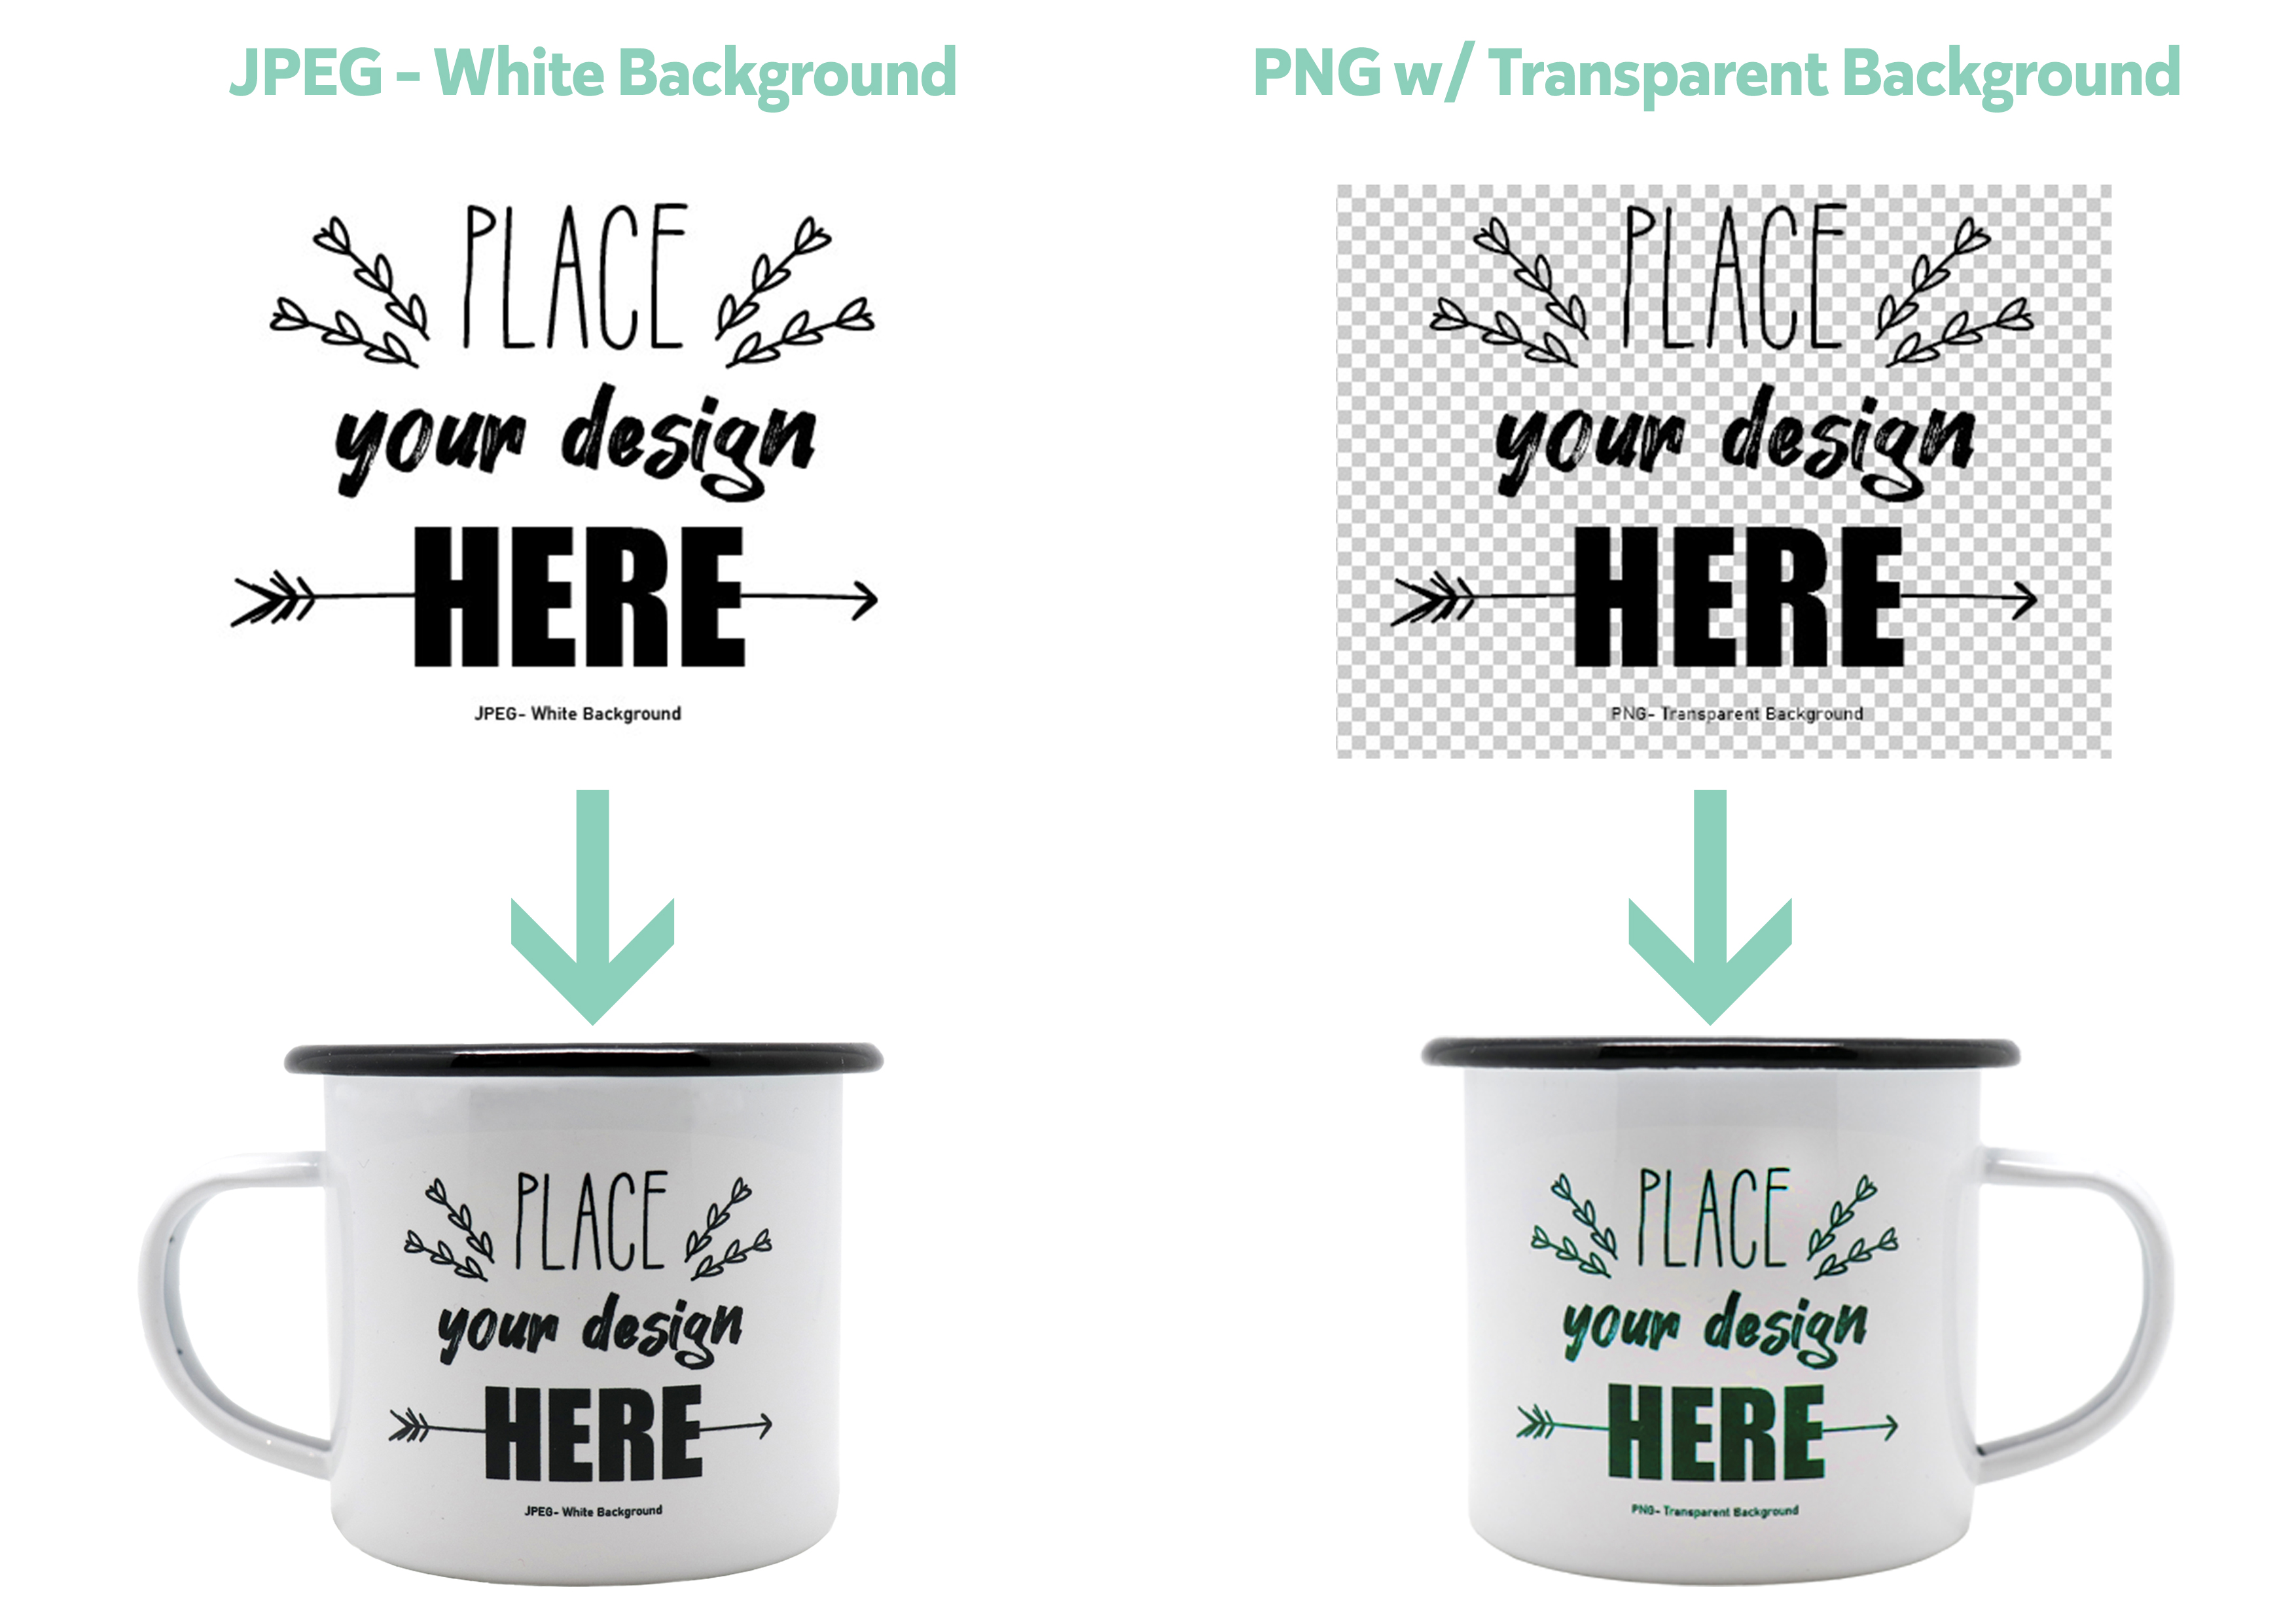
JPEG vs PNG
All of our mugs require a JPEG image at 300ppi.
Please note, you are not limited to background colors, patterns or designs. If you wish to keep the background the same color as the mug, its important that you have a white background since true white prints transparent on mugs. The easiest way to ensure this is by saving your design file as a JPEG otherwise you can save as PNG, but you will need to as a true white background (#FFFFFF) for optimal results.
We do not recommend a PNG with transparency because the transparent background will result in a green hue around your design. This is the printer trying to add color in those partially transparent areas.
Artwork Placement
Figuring out where to place your artwork on the mug template might seem confusing, but it’s actually very simple!
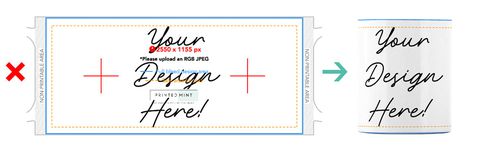
Artwork placed in the center of the template will be printed on the center of the mug, directly across from the handle. More often than not, this is done by accident. If your design is appearing in the center of the template in the Printed Mint Custom Designer, your file may be the wrong size.
Artwork placed on the left side of the template will be printed on the side of the mug with the handle on the left:
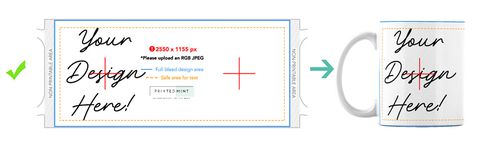
Artwork placed on the right side of the template will be printed on the side of the mug with the handle on the right:

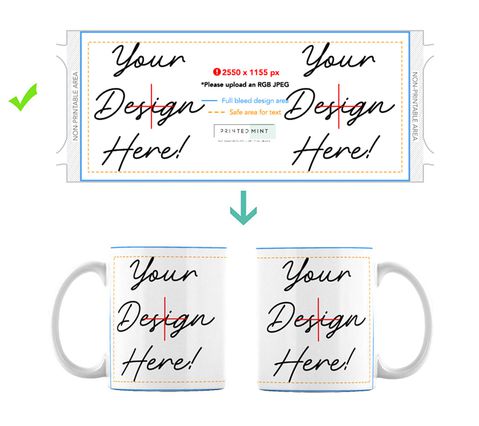
For a two-sided design, simply place your artwork on both sides of the template:
Colored Mugs
When designing for colored mugs such as our gold, pink or silver mugs, it’s important to remember that the printing process does not use white ink. The lighter the color, the more transparent, or see-through it will be. This is demonstrated in the image below:


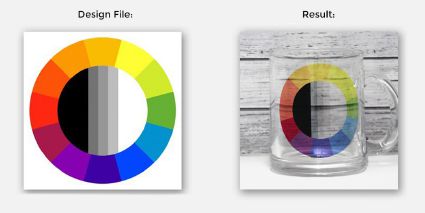
Glass Mug
On the Glass Mug light/pastel colors are not recommended. The lighter the color, the more transparent it will appear on the final product. For example, black will be opaque, while white will be completely transparent. Black always prints best. This is demonstrated in the image below:
Black Mug 11 oz.
When designing for the Black Mug 11 oz. there are two methods you can use for a successful print.
Method One
Use a true RGB Black (0,0,0) as a background then add your text, illustration, or graphic. In doing this, your design will have the seamless look of continuous black around the whole mug.

Method Two
Try using a photo! This method is similar to designing all our other mugs. Simply place your photo across the full bleed parameter with important design elements inside the safe area. This ensures the photo is printed across the white of the mug.

Tips & Tricks
No matter which method you use, the template guidelines must be followed to have a successful print. Remember these guidelines are there to help you. Your design should always go all the way across the full bleed line (blue).
If you do not the other side will remain white. If you wish to have one side be the photo and the other side black you will need to add a true RGB Black (0,0,0) background. Finally, the important elements of your design, for example, text, need to be inside the safe area (orange dashed line).
Disclaimer
You might see the edge of your print from either the black background or the photo upload. This is a common occurrence and a result of the printing process.

Open a Wholesale Account Today
Join the Printed Mint family and take your business to the next level
